The All-Inclusive Guide to Dialing In
In our recent hit blog, the Top Five Grinders of 2022, we just began to scratch the surface of the importance of why you should buy a decent grinder with your espresso machine and the travails of not having a standalone grinder. If you’re still on the fence, we will now take a much deeper look into what makes a great grinder and how it can enhance your espresso and hone your barista skills. Next, we will focus on the importance of dialing in your grinder and offer some essential tips on how to navigate making changes day-to-day. You will not become an espresso expert overnight, but you will be armed with the tools to get you there.
What does dialing in mean?
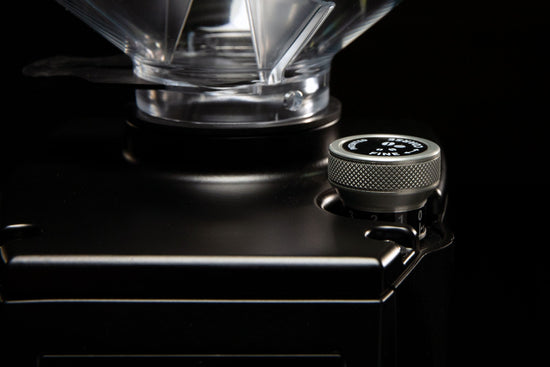
Dialing in refers to adjusting the grinder’s burrs to make your coffee’s grind particle size finer or coarser. This adjustment device can take the form of a collar, knob, worm drive, or dial. The device you’re turning may look different on different grinders, but they all essentially do the same thing. Your favorite barista does this when opening your favorite café in the morning. They will pull a shot, see how it’s flowing, and if it looks good, they’ll taste it, and make adjustments as needed to set the espresso recipe parameters for the morning. A lot of work happens behind the scenes before the first espresso shots are served in the morning, which is why the before-grind stage is essential to excellent espresso.
Before Grinding & Puck Preparation
Coffee may be the most complex beverage on the planet, and you’re handling an organic product that sommelier experts have said has 300 more flavor compounds than wine. This article will not cover palate development, but we encourage tasting every shot you pull. This way, you can figure out what you don’t like in your espresso just as much as you do. The tools that help you grind and prepare your espresso puck are essential to excellent espresso, helping you make adjustments faster, helping build an espresso recipe, and help ensure you’re getting the flavors you want in the cup.
Time to prepare your mise en place
Grinder

This one seems obvious, but choosing a decent burr grinder is essential. We recommend an espresso-focused grinder with a large range of adjustments that makes fine-tuning a breeze. The minimum to spend here is just under $400—the Baratza Sette 270 is an excellent starter grinder. The Eureka Mignon Specialita fits into our mid-range of price and performance. Lastly, the Eureka Atom 75 is our top performer. Many of the grinders in our lineup fall between $400-$1000.
Adjustment Style: Infinite vs. Stepped
Infinite adjustment dials dominate our grinder lineup because they allow you to fine-tune incrementally, mainly to adjust to those in-between spaces. On the other hand, stepped adjustment movements tend to be larger, causing you to waste coffee and chase that grind adjustment around the dial.
Other Considerations
Other espresso grinder features such as burr size, burr style, and motor power are something to consider when choosing a grinder. In tandem, they can help grind your coffee dose faster, evenly, and consistently. However, our primary consideration here is the ability to make precise adjustments.
Coffee

The coffee you brew for espresso is critical. The coffee bag will give you a wealth of information, such as roast date, roast level, country of origin, and blend data.
- We recommend using a bag of coffee with a roast date, not a best-by date, indicating that the coffee was roasted recently. The sweet spot for espresso brewing (5-10 days off roast). You can still brew with coffees with a best-by date, although results may be less consistent. Coffee is an organic product, so once the bag is opened, it begins off-gassing (releasing carbon dioxide).
- When not brewing, we recommend storing beans in an airtight container, removed from direct sunlight. The best containers create a vacuum and remove oxygen entirely.
- The kind of coffee you choose is essential. Ultimately, what tastes best to you is what matters. Your palate is unique. We recommend starting with using a coffee that is an espresso blend. Espresso blends are generally medium roasts with a round body, a sweet and chocolatey middle, and a smooth finish. They are specially formulated and designed by the coffee roaster, which is delicious as a straight shot and compliments the natural sugars in milk. Espresso blends tend to be easier to dial in and work with more than single-origin coffees.
- Spend time and practice with one kind of coffee for a few weeks. Consistency will go a very long way. Expect to waste coffee. At this stage, you’re figuring out what works for your palate and what doesn’t.
Scale

A scale like the Acaia Lunar or the Timemore Nano will help with consistency. These two are optimized to be used on a drip tray for espresso; however, you can use any scale weighing within at least .5 of a gram. A scale helps measure in grams how much ground coffee is in your portafilter and how much liquid espresso yield, in grams, you’re extracting. Taking the guesswork out of the process, eyeballing your coffee will become a thing of the past. Every coffee grinds differently, and there are too many variables that affect the way it grinds, such as age, roast level, coffee varietal, how the coffee is processed, and even the barometric pressure of your kitchen. The 20 grams you’re dosing into your portafilter today will be different from the 20 grams you’re dosing into your portafilter the following week. If you’re not using a scale, you’re pulling shots in the dark.
Tamper & tamping accessories

Throw the “30 pounds of pressure” adage out of your vocabulary. Burn it with fire. What matters most about tamping is being level and consistent. It doesn’t matter how hard you tamp if your grind size is too coarse.
Consistency tools can give you an even coffee bed to tamp with, such as a distribution tool like the Artpresso Solo or the SWORKS WDT (Weiss Distribution Technique). The former tool helps prevent uneven tamping by fitting over the circumference of the portafilter, with a depth-adjustable distributor on one side and a depth-adjustable tamper on the other. The latter tool helps break up coffee clumps after grinding. There is some debate that WDT tools are also better at distribution than distribution tools. Disclaimer—these tools can help with tamping and distribution issues but are not 100% necessary for puck preparation.
In summary, espresso puck preparation is constantly evolving, and having the proper tools in advance, set out for ready use, will help you master your espresso workflow. Everyone can make coffee given the correct tools; however, becoming a good home barista requires practice and patience.
Espresso Recipe, Brew Ratio, & Dialing In
Great, so you’re all set with your grinder, fresh coffee, a scale, and your trusty tamper; now you just need an espresso recipe. An espresso recipe is your rosetta stone, your guide into deciphering the many languages of coffee. What makes up an espresso recipe?
DOSE —> YIELD—> TIME
1. Dose
Your coffee dose is the amount of coffee you’re grinding into your portafilter. Choose the amount of coffee based on what portafilter you are using, and try to stay as consistent as possible once you choose your dose. This is the simplest variable to change in your espresso recipe without changing other variables.
Double Spouted Portafilter (double basket) -— holds between 16-19g of coffee.
Bottomless Portafilter (triple basket) — holds between 18-22g of coffee.
*Pro Tip* Your coffee will release Co2 as it sits in your hopper, becoming less stable as the days and weeks go by. One way to adjust your espresso recipe before adjusting your grind particle size is up-dosing. If your coffee is aging and you typically dose 18g, up your dose to 19g, 19.5g, and 20g, respectively. Extend the lifespan of your coffee by storing it in an airtight container or one that removes oxygen.
2. Yield
COFFEE: LIQUID ESPRESSO
An espresso ratio is a fancy term for your coffee input and output. Your ground coffee to liquid yield ratio will typically range from 1:1 (ristretto) to 1:3 (lungo). Many folk’s flavor preferences fall in the middle of the spectrum, so we recommend beginning with a 1:1.5 ratio. Using your double-spouted portafilter with your double-basket, use 18g of ground coffee into your portafilter and look for a liquid output of around 30g. That said, choosing your espresso ratio based on the portafilter basket you’re using is not 100% the rule, merely a guide to follow. A common misconception is that you need a double basket to pull a double shot. This is not true.
The Process
- Ready your scale and tare your portafilter on it
- Set your dose and grind your coffee into your portafilter
- Aim for a set weight measured in grams, not volume
- Pull your shot and taste
The volume of a shot changes based on the coffee used and when it is roasted. Fresh coffee tends to have a lot of crema and weigh less than a shot using older beans; thus, measuring your liquid espresso yield in grams gives you more accurate results. Using a scale can make changes to your espresso recipe much easier, faster, and easier to understand. Furthermore, personal preference comes into play when altering your espresso ratio. Perhaps that shot you just pulled was too intense or viscous; keeping your dry coffee input at 18g but increasing your output to 35g or 40g for 1:2 ratio will alter that shot's finish and overall body. The actual flavors you will get from these changes will be coffee-dependent.
*Pro Tip* The same principle applies when using a bottomless portafilter with a triple basket. Increase your dose from 18g to 19-21g. If you’re aiming for a 1:1.5 pull, start with 19g of ground coffee for a 27-30g output. If you increase your dry dose to 20g, keep the same general output.
3. Time
The time it takes your espresso to extract is the variable in your recipe that ties both dose and yield together. Use time as your anchor. How long your coffee takes to extract correlates to how fast or slow your coffee flows into your mug. Manipulating your grind size via the adjustment dial on your grinder will be vital in determining this variable. Changing your grind will allow you to fine-tune the time of your shot. You’ll most likely need to change your grind daily too. Your shots will pull faster as coffee ages, encouraging you to grind finer.
Dialing in (2 Scenarios)
Dialing in requires you to adjust your grinder to make your grind particle size coarser or finer based on the feedback you see and taste from your resulting espresso. The two scenarios below will help guide you on what to do when you do everything right but the result is a disaster. Most of the grinders in our lineup have infinite adjustment dials, which require turning a dial clockwise or counterclockwise to make your grind finer or coarser.
1. Your espresso recipe is 18g IN // 30g OUT // within 25-35 seconds
Double spouted portafilter // double-basket
- Start your shot, and the first drops of espresso begin to fall around the 2-second mark.
- Liquid seems to be rushing out way too quickly with little to no crema.
- Stop your shot when you reach 30 grams of liquid; however, it took 10 seconds to get there. You must adjust your grind size finer to slow the stream of espresso.
Water is lazy and tends to love the least path of resistance, and when your grind size is too coarse, it will flow very violently, leading to under-extracted and weak-tasting espresso. The most important thing is to keep your espresso recipe consistent. Make an incremental adjustment on your grinder in the fine direction slowly while simultaneously purging a bit of coffee. Pull another shot after the adjustment you just made, and if you’re still getting your target yield too soon, keep adjusting until you're tame that espresso stream. The same principle applies when your shots take a long time to extract.
*Pro Tip* Incremental adjustments go a very long way in helping you dial in. It ensures that you’re not going too far. Making big jumps in the fine direction can cause a grinder jam. For example, on infinite adjustment dials represented by numbers, slowly move the dial a quarter or a half number instead of moving from one number to the next.
2. Your espresso recipe is: 20g IN // 40g OUT // 30 seconds
Bottomless portafilter // triple basket
You nailed your extraction with the exact stats in your recipe, and your espresso flowed beautifully with no channeling, yet it tasted awful. How could you seemingly do everything right, but it tastes so horrible? You should make alterations to your espresso recipe first and change your grind last. Here’s a helpful strategy:
- Most likely, your coffee tastes bitter and ashy because it is over-extracted, lacks sweetness, and leaves a hollow and drying finish on the palate. Over-extraction happens when too many soluble flavors are removed from the coffee.
- Keep your dry dose constant (20g). We want to keep some variables consistent so we’re not changing too many things simultaneously.
- Aim for around 28-32g of liquid yield.
- To achieve this change, make a minor grind adjustment finer to help slow the flow of your espresso.
- Pull your shot and taste again.
In summary, making just a slight grind adjustment on your grinder or altering your espresso by a few grams or a few seconds can radically change the outcome of your result. Dialing in takes a bit of practice to master, and using tools like a scale and an espresso recipe to help ground you will make the adjustments you make faster and make a little bit more sense. Happy shot pulling!